Framework Laptop Inside 2006 MacBook: DIY Upgrade Reduces E‑Waste
Generally, I think creator Edoogg did a pretty cool thing when he swapped a 2006 MacBook shell for a Framework Laptop motherboard, delivering a quirky, upgradable hack that blends vintage design with modern specs, you know.
Why the FrameBook matters
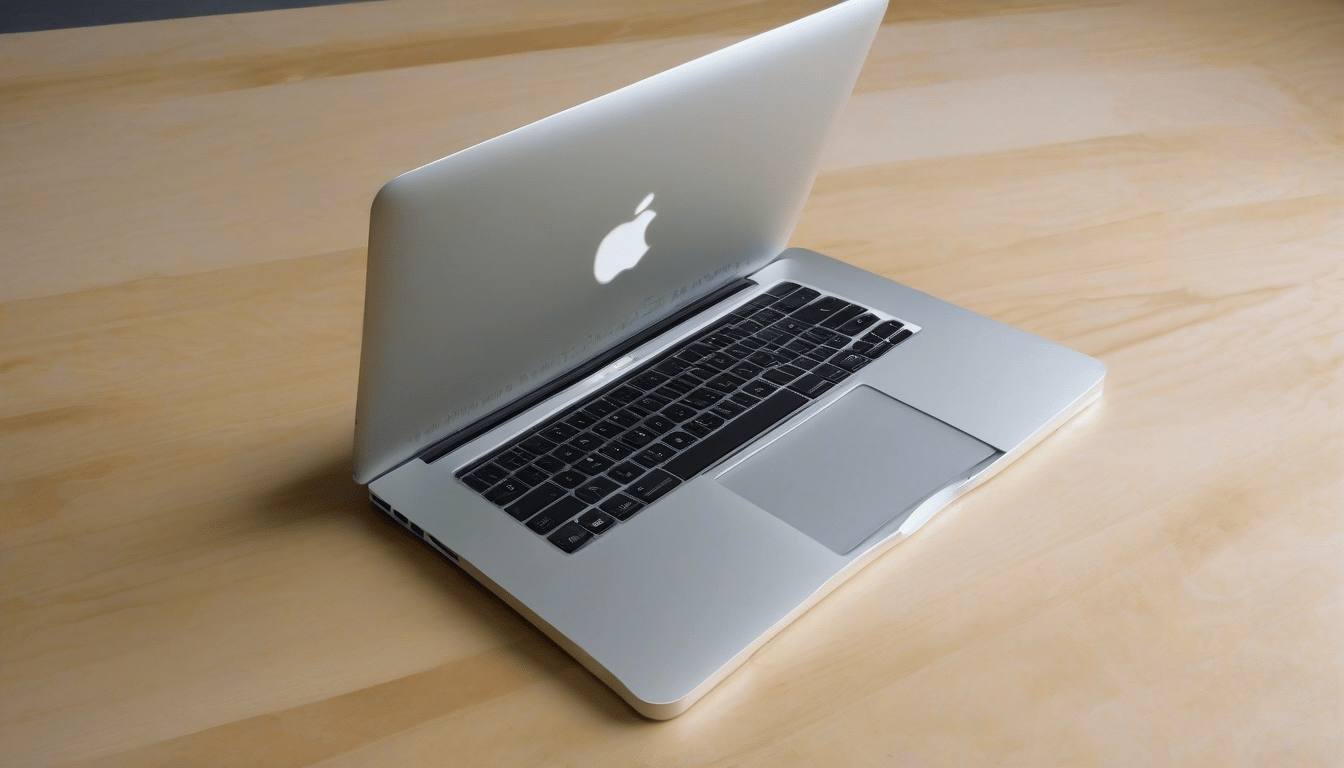
Obviously, the world of DIY hardware got a fresh twist when I decided to graft a modern Framework Laptop motherboard into the chassis of a 2006 MacBook, which is kinda old, but still cool.
It shows how we can extend life of obsolete gear, and also prove Framework’s modular design is super flexible, you can do alot with it.
Finding the right shell
Basically, I sourced a handful of first‑generation 13.3‑inch black MacBooks on eBay, they were battered, missing batteries, couldn’t power on, but the aluminum shells were still intact, which is pretty lucky.
After tossing the dead internals, I started turning the vintage frame into a housing for a brand‑new Framework Laptop 13 mainboard, it was a bit of a challenge, but I managed.
Core components of the build
The heart is a Framework motherboard with an Intel Core i7‑1280P, 64 GB DDR4 RAM, and a 13‑inch MND307DA1‑9 display panel, which is pretty powerful, if you ask me.
I added a USB hub, an 8‑megapixel camera, a speaker kit from Framework, and a USB 2.0 expansion module, it was a bit of a puzzle, but it all fits together nicely.
To keep the MacBook’s iconic look, I kept the original keyboard, trackpad, and the back‑lit Apple logo, it still looks like a mac, but it’s not.
Custom solutions and glue
The keyboard and trackpad cables were soldered straight to the Framework board – at first it worked, then I yanked the cable and tore a solder pad, which was a bit of a setback.
A replacement case and second round of soldering fixed it, an I/O shield was repurposed for extra ports, it was a bit of a hack, but it works.
Super glue ended up being a star player, I used it to secure the dead MacBook battery (stripped of cells) and to affix the USB hub inside the cramped case, it’s a bit messy, but it holds.
The final touch was a custom LED that mimics the Apple logo glow, glued to the back of the shell and wired into the hub, it looks pretty cool, if you ask me.
Timeline and learning curve
The whole thing took about three months, I learned soldering techniques and fiddled with 3D modeling for custom parts, it was a bit of a learning curve, but I got there.
It feels a bit janky, but the charm is in the visible craftsmanship and the statement it makes about e‑waste, you know, it’s a bit of a conversation starter.
What could be better
If I replace the improvised USB hubs with bespoke PCBs, I could pick any I/O configuration I wanted, it would be a bit more professional, I think.
Finding sturdier mounting methods would cut the reliance on glue, that’s a big improvement for future builds, I’ll keep that in mind.
Impact on e‑waste
By reimagining a classic MacBook as a Framework‑powered notebook, I deliver a quirky, upgradable hack and point to a greener path for hobbyists, you can do the same, just think outside the box.
The FrameBook stands as proof‑of‑concept that vintage shells can house modern hardware, reducing e‑waste while satisfying nostalgic cravings, it’s a win-win, if you ask me.